Key Takeaways
- Many spray-foam problems are invisible at surface level — they develop in the hidden zone between foam and timber.
- Warning signs relate primarily to trapped moisture, condensation, blocked ventilation and timber decay.
- Some signs — like a mortgage flag — indicate a lender has identified the problem before you have.
- An independent PCA-protocol inspection is the only reliable way to assess the roof condition beneath the foam.
- Spotting warning signs early allows you to address problems before they become structural.
Sign 1: Damp Patches or Staining on Ceilings
Damp patches appearing on ceilings — particularly those below a foam-insulated roof — can indicate that moisture is penetrating or condensing within the roof structure and tracking down to the plasterboard. This is not always visible as dramatic water damage; sometimes it appears as faint yellow or brown staining, a slight bubbling of paint, or a softer texture to the ceiling surface.
Isolated or intermittent damp patches that appear in cold weather (or after prolonged wet weather) and are directly below the roofline are worth investigating. They suggest moisture is moving through or from the roof structure — which could be linked to condensation trapped by the foam.
Note that damp patches also have other causes — leaking tiles, blocked gutters, or plumbing issues — so do not assume foam is always to blame. An inspection identifies the source.
Sign 2: Musty or Earthy Smell in the Loft or Upper Rooms
A persistent musty or earthy smell in your loft space, or occasionally in upper rooms, can indicate mould growth within the roof structure. Mould thrives in persistently damp conditions — precisely the kind of environment that develops when spray foam traps moisture against timber and prevents adequate ventilation.
The smell is caused by microbial volatile organic compounds (mVOCs) released by mould and fungal activity on damp wood. If your loft smells musty when you open the hatch — particularly in damp or cold weather — it is worth investigating further rather than dismissing it as a general loft smell.
Sign 3: Discoloured, Cracked or Sagging Foam
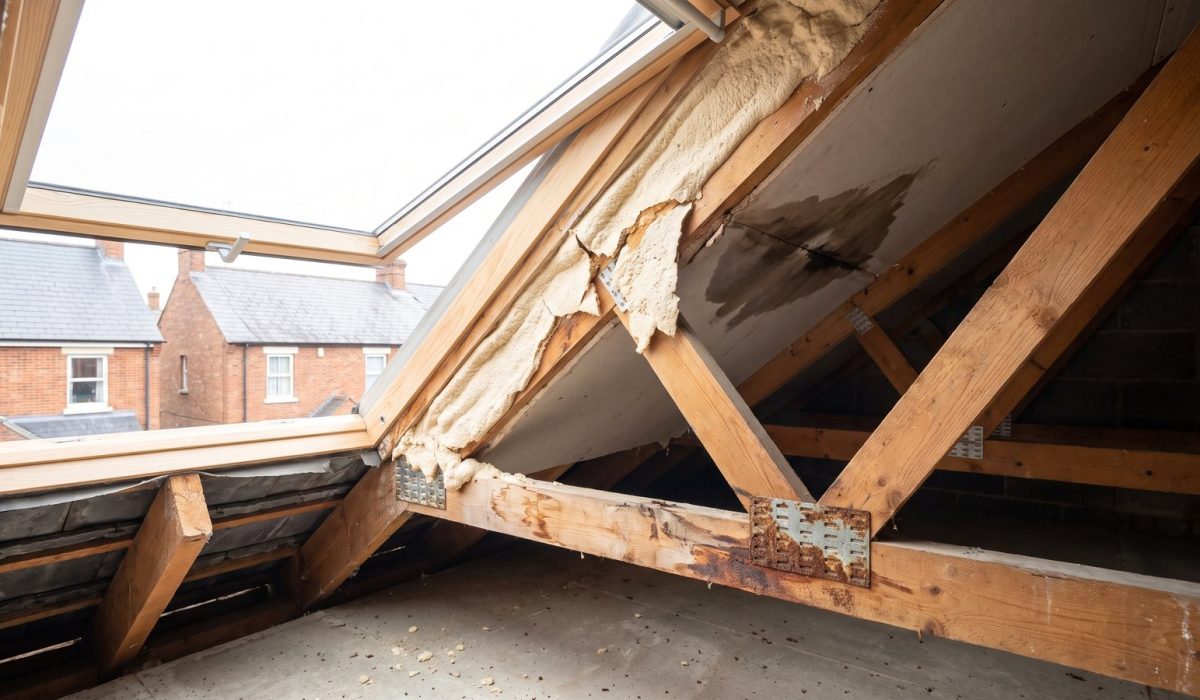
Foam that has become discoloured (yellowing, browning, or darkening beyond its original colour), developed surface cracks, or appears to be pulling away from the timbers may indicate chemical degradation, UV exposure (where relevant), or moisture damage affecting the bond between the foam and the substrate.
Foam that is sagging or pulling away from timbers creates gaps through which damp air can reach the wood. It also indicates the foam is no longer performing its intended function. Neither of these conditions is visible from below — they require a visit to the loft space to observe.
Sign 4: Condensation on Cold Surfaces in the Loft
On a cold morning in winter, enter your loft and look for condensation: moisture beading on cold surfaces such as the underside of roof tiles, the surfaces of any water tanks, pipework, or the foam surface itself where it is cool.
Some condensation in a loft is normal. Extensive condensation — particularly where there are visible droplets of water, wet surfaces, or frost — indicates that warm moist air is entering the loft space and meeting cold surfaces without adequate ventilation to carry it away. This is the condensation cycle that, sustained over time, drives moisture into timber and contributes to rot.
Spray foam that has sealed the ventilation void is a common cause of this pattern in previously ventilated roofs.
Sign 5: Soft or Spongy Timber (Where Visible)
Where roof timbers are accessible — around the loft hatch, at the ridge, or at the eaves — press the wood with a thumbnail or a penknife blade. Sound timber resists easily. Timber that allows the nail or blade to push in easily, or that feels spongy underfoot if you are near the joists, may be showing early signs of rot.
This test has significant limitations: it only assesses the visible, accessible surfaces. The areas most affected by moisture from trapped condensation — the sections of rafter beneath the foam — cannot be tested this way without removing the foam first. It is an early indicator only, and a finding of soft timber is a clear prompt to commission a professional inspection.
Sign 6: A Mortgage Survey Flag
If your home has been surveyed in connection with a mortgage application — whether you are buying, selling, or remortgaging — and the surveyor flagged spray foam as a concern, that flag itself is a warning sign. It indicates that a professional surveyor could not adequately assess the roof timbers through the foam.
The surveyor is not necessarily saying your timbers are damaged. They are saying that the foam prevents a proper assessment — which is a problem in itself, and which may indicate that issues could exist beneath the foam surface. The appropriate response to a survey flag is an independent PCA-protocol inspection.
Sign 7: Blocked or Restricted Eaves Ventilation
In a traditional pitched roof, air circulates from eaves to ridge through a ventilation void between the roof covering and the insulation layer. At the eaves — the lowest edge of the roof slope, where the roof meets the tops of the external walls — ventilation gaps allow outside air to enter.
Spray foam applied right down to the eaves — particularly when sprayed in thick layers or into a roof with tight eaves construction — can physically block these ventilation gaps. Blocked eaves ventilation is visible (or partially visible) from inside the loft by looking towards the eaves with a torch. If the foam fills the space where air should be flowing, the roof’s ventilation is compromised.
Blocked ventilation does not create immediate visible damage — but it creates the conditions for everything described above: trapped moisture, condensation, and progressive timber deterioration.
What to Do Next
If you recognise one or more of these signs in your property, the next step is an independent PCA-protocol inspection from a surveyor registered on the Property Care Association Spray Foam Inspection register.
This inspection will:
– Assess the foam type and installation quality
– Establish the visible and assessable timber condition
– Check ventilation arrangements
– Document any moisture or rot evidence
– Provide a risk classification and documented findings
It will not do any harm to your property, and it gives you objective information to act on rather than guessing. Do not attempt to assess the timber condition yourself by removing sections of foam — this can cause damage and still will not give you a reliable picture of the hidden areas.
The Bottom Line
Warning signs exist for a reason — they prompt action before small problems become large ones. If you have spotted any of the signs above, commission an independent inspection. If you have not checked your loft recently, it is worth doing so. The information it gives you — whatever it shows — is always better than uncertainty.
Book an independent PCA-protocol inspection to know what you’re dealing with.
This is general information, not financial advice — please consult a qualified mortgage broker about your circumstances.
Related reading: Spray foam & condensation: why it traps moisture · Spray foam & timber rot: what to look for · The PCA Spray Foam Inspection Protocol explained